In one of the previous posts, I explained step by step tutorial for creating HTTP based SOAP web service in TIBCO BW 5. In this post, I will explain step by step how to Develop SOAP Web Service in TIBCO BW 6.
Example Scenario for developing SOAP web service using BW 6.5
In order to keep things simple and just to explain the basics of developing SOAP service in BW6, I will take a simple scenario. We will develop a SOAP service with only one operation to get marks for a student. Without having complex implementation detail of the core process, we will use random function to generate a number and call it as Marks for the student. If you want to learn further about how to develop a SOAP Web service in BW6 with multiple operations, refer to a Video Tutorial on TutorialsPedia YouTube channel on the below link:
TIBCO BW SOAP Web Service Video Tutorial With Multiple Operations
For our SOAP Web Service with one operation, Now let us start developing SOAP BW6 Service.
Step 1: Create a Project in BW6
In BW5, we used TIBCO Designer tool as our design & development IDE and build any processes using it. In BW6, classic designer has been replaced with an eclipse based IDE called TIBCOBusinessStudio.
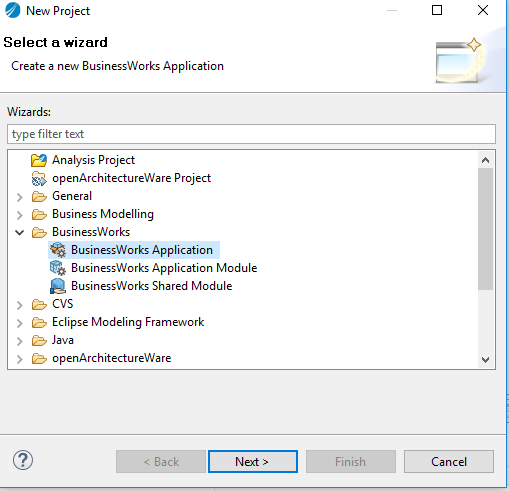
Open BusinessStudio and create a project by choosing File–>New–>Project option from the main menu bar. New Project Wizard will open and you need to choose BusinessWorks Application under BusinessWorks as shown below:
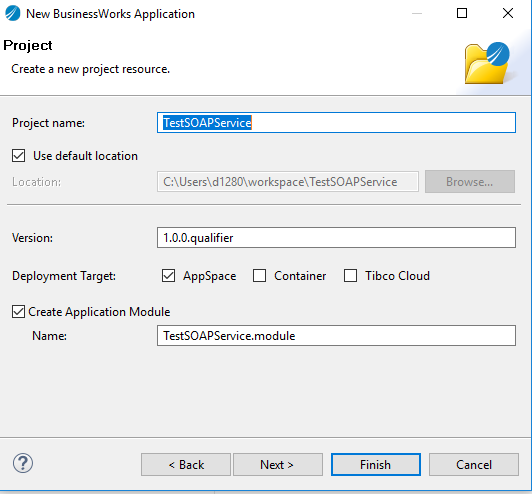
Click Next. Now you will have to enter name for the project. I named it as TestSOAPService. If you have checkbox for module checked, an Application module will also get created for your project. For Deployment Target, keep AppSpace checked for this example:
Click Next and select the Asset Types that you want to get included in your project. Basically, folder structure will get created in your project based on the selected assets. Keep the selection as-is so that typical folder structure gets created for you and then click Next.
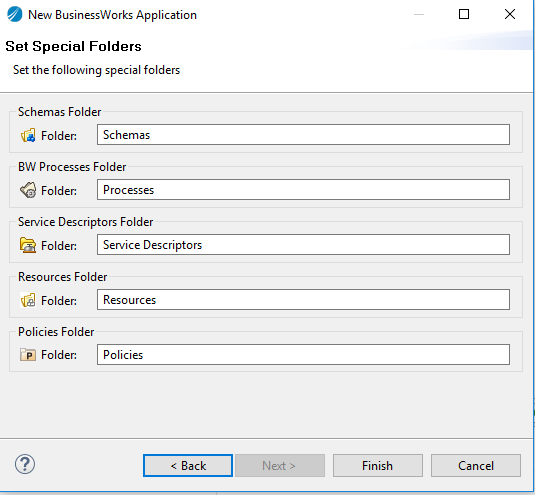
In this wizard, you will be asked for the folder names that you want to use for specific asset types. If you want to have your own naming standards, you can change or else, keep the default as shown below:
Now click Finish and your project blueprint will get created.
Step 2: Create SOAP Service for a BW Process
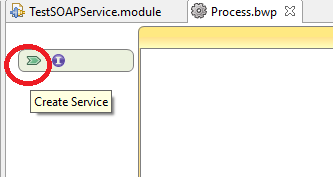
Once your step 1 is completed, you will see that a process has been created in the module automatically with the name Process.bwp. In real scenarios, you may opt for creating new process or rename it but for the sake of simplicity, we will keep the same in our tutorial and will build the service on top of it.
Double click on this process to open it in design view. Now click on the green symbol (shown in the red circle below) to create a new service:
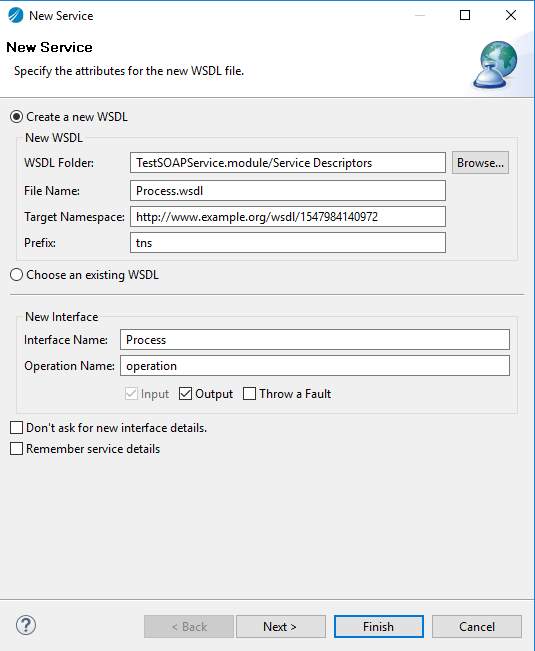
A new wizard will be opened for defining new service. Here we will specify WSDL folder, WSDL File name, Target namespace and Prefix. At this point, there is an option to use any existing WSDL as well if we have one available already.
For the new interface, specify name and operation name as well. I kept everything as default here as you can see below:
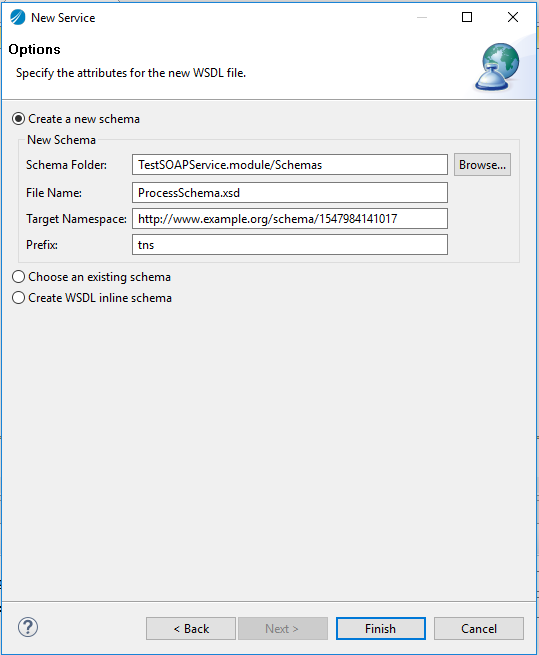
Click Next and now you will be asked to provide Schema details. You can choose an existing Schema, use the option of WSDL inline schema or you can create a new Schema file by giving new file name, location, prefix and namespace. I am opting the option of creating a new schema for our service as seen below:
Click Finish and now we are done with this step of defining our SOAP service basic structure.
Step 3: Implement Operations and Define EndPoint Binding for SOAP Service
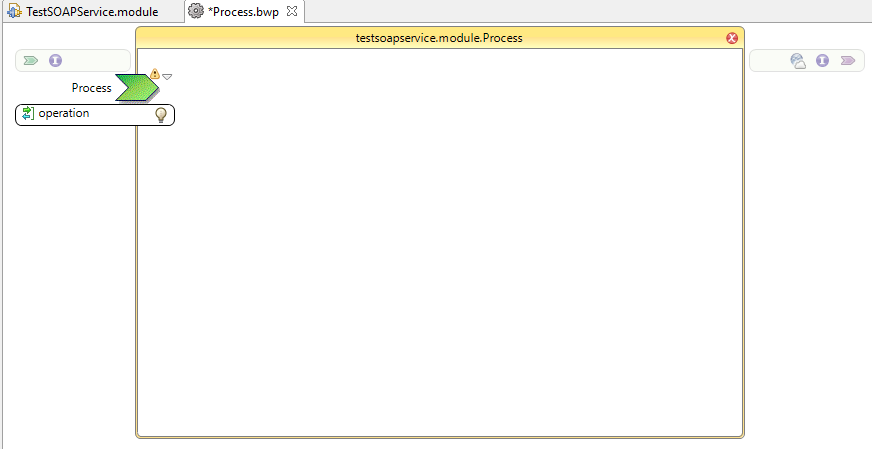
At the end of step2, now we have our process with an operation defined but there is still no implementation of the operation and also no endpoint has been defined/configured. Our process will be looking like below at this stage:
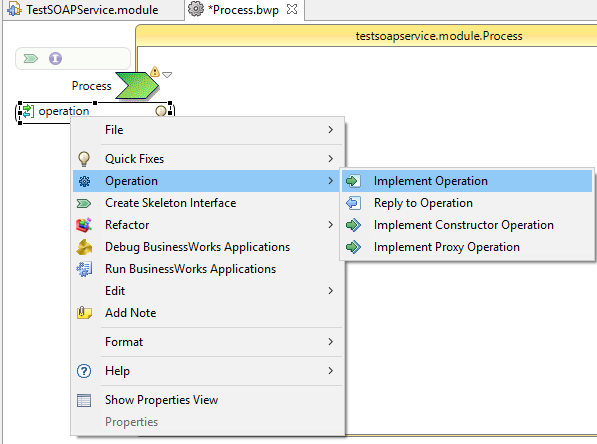
Now Right Click on the operation and choose Operation–>Implement Operation option as shown below:
Receive and Reply activities with the names OperationIn and OperationOut will get added in the process. Since we want Name of a student as Input and Marks as output, we need to rename parameters in Receive and Reply activities accordingly.
For OperationIn (Receive activity), in the Input Editor, rename ‘in’ String element to ‘Name’ as shown below:

In the same way, rename ‘out’ String element in the output editor tab of OperationOut (Reply activity) as seen below:
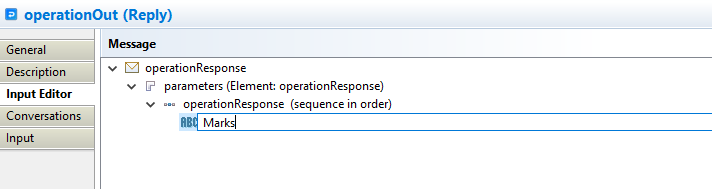
Please note that you can change element names in the schema file directly as well and changes in the schema file will reflect in the input and output of the respective palette activities where they are being referenced.
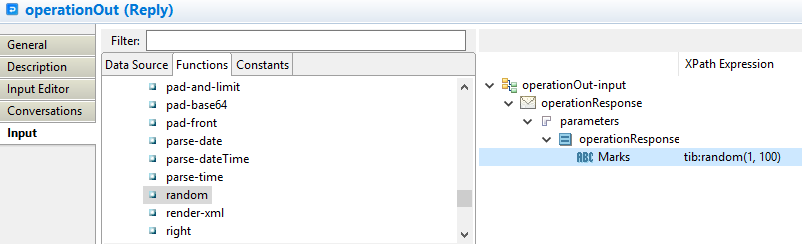
Now for our simple implementation approach, we will just use Random function to return Marks anything between 1 and 100. Random function is available under Tibco Functions group.
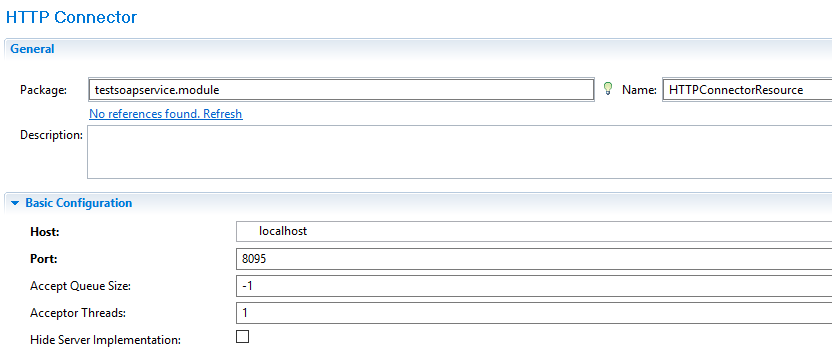
Now we need to define Endpoint for our service for which we first need to define a HTTP Connection resource that we will use. Right click on Resource Folder and choose New–>HTTP Connector. For this HTTP Connection specify Host and Port. Make sure that you use a port which is open and for host, you can specify name or IP of the machine:
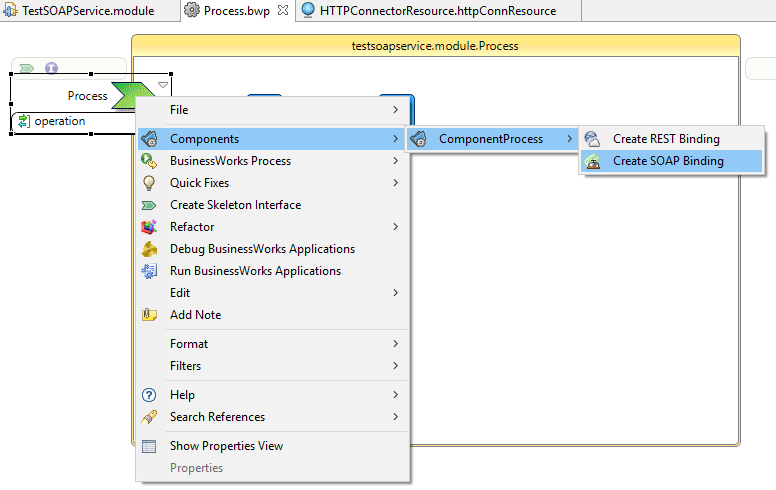
Now we have HTTP Connection created which is able to be used for the service to listen on the port and host specified. We need to define SOAP Endpoint now using this connection.
In the Process, Right click and then choose Components–>ComponentProcess–>Create SOAP Binding as shown below:
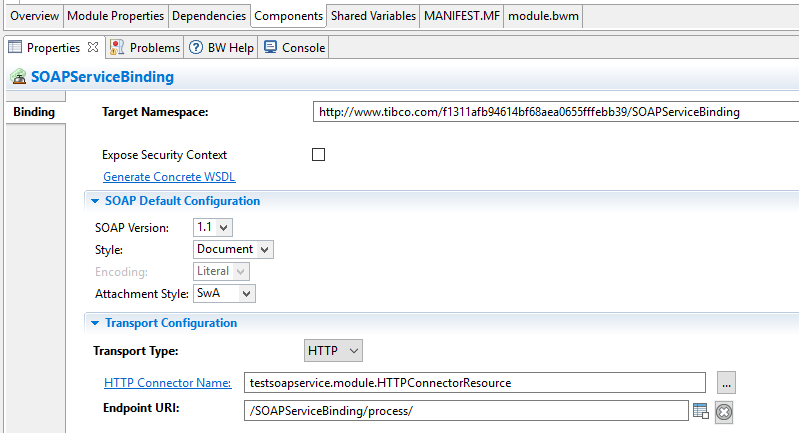
Now, service module will get opened in front of you and in the binding tab, you need to specify details for binding. You will specify soap configuration details and transport configurations using the connection resource we created earlier as shown below:
Save all and validate the project to make sure everything is valid. Once validated, click on Generate Concrete WSDL and save concrete wsdl anywhere in your file system as we will use this concrete wsdl in the next step for testing.
we can now proceed to the next step of testing BW6 SOAP Service.
Step 4: Test BW6 SOAP Web Service using SOAP UI
In order to test this SOAP Service, we will load it in debug mode and then hit the service using SOAP UI. For SOAP UI, we will load the WSDL that we saved in the previous step using Generate Concrete WSDL. Please note that It is always possible to get the WSDL live by hitting WSDL URL once service is deployed in server or even when running in debug mode.
Load the service in Debug mode by clicking Run–>Debug Configuration–>BusinessWorks Application–>BWApplication and then choosing our project and associated module. Once project has been loaded successfully in debug mode, we need to load the WSDL in SOAP UI and hit the service.
As you can see in below screenshot, we have successfully consumed the service and got back the response as desired:

That completes step by step tutorial for BW6 SOAP web service. Feel free to comment below in case of any confusions or for any further help.
You can also watch my video below about SOAP Web Services Best Practices. Don’t forget to subscribe to the channel for more updates in future:
How to create 10 employees details schema like eno,ename,age,address
Just specify employees as repeating in the schema and you can then define any number of employees using that schema.
After creating Concrete WSDL I want to write that schema content into write file I am confused how to do it could you please help me out I am trying to this case study
{Please create a service as below.
Expose a service which takes 10 Employee details like name, EID, Salary, Age and Address, then increment the salary by 10%.
write all the employee details to a file and put a status message to queue and reply back to service as acknowledgement.
Also, Create a batch process that runs every day at 5PM to copy the file created above to another directory.
Receive the status message through JMS receiver, read all the employee details from files present in destination directory of batch process, and send them to HTTP browser.
}
Hi Ajmal,
i have been learning TIBCO mostly by watching you blogs. it is really helpfull.
can you publish some more regarding BW 6.x? please