Postman is a popular tool used by software testing teams. It is more commonly used for REST APIs testing but the capabilities and features of this tool are not just limited to such testing. Postman provides rich set of features for API documentation as well. It can be used to Design APIs by creating API Specifications with popular definition types like OpenAPI, RAML etc. In this Postman OpenAPI Tutorial, I will explain how to create API Specifications using Postman.
Step By Step Postman OpenAPI Tutorial for Creating OpenAPI Specifications for a REST API
REST API Specifications can be created and documented using various tools. I already explained in another video tutorial how to create API Specifications using Swagger Editor. I also discussed & demonstrated about using a graphical tool Stoplight Studio for OpenAPI Specifications. Now this tutorial explains and discusses how to use Postman for creating OpenAPI Specifications.
Step 1: Create API Using Postman in Your Workspace
To create API Specifications in Postman, click on APIs tab in your workspace. You will see the list of any APIs already created or else you will see No APIs yet. In any case, you can create a new API by choosing Create an API option or New button from the top. There is an Import option as well but in our tutorial, we are creating API Specs from scratch, so we won’t use import.
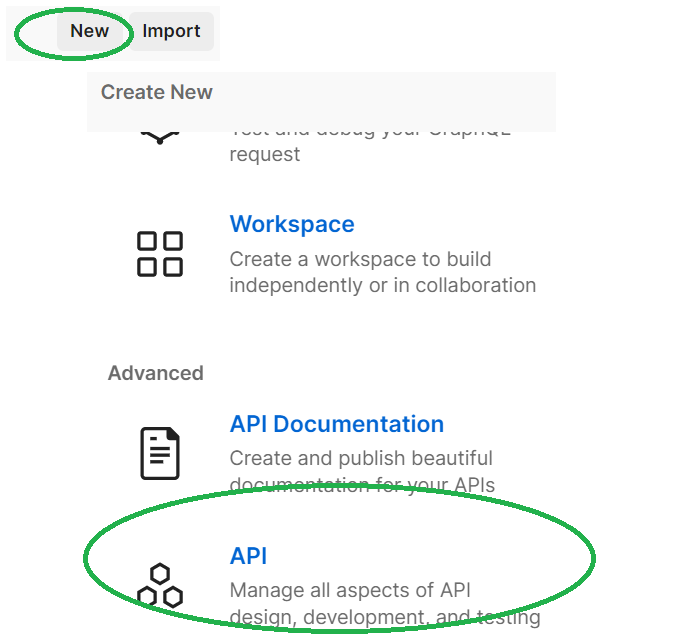
If you click on New, you will see plenty of options in a new window. For creating API, choose API under Advanced options. This option is used to manage all aspects of API design, development and testing.
Step 2: Define Basics of your API in Postman
Now you need to provide a name to your API. You can also provide summary and description as per your requirements in free text fields.
There are options to connect to a repository like Git for version control. You may also create collections to associate with this API. For this purpose, you can either create a new API Collection or copy an existing collection. The most important subsequent step is the API Definition which we will majorly focus from here onwards.
Step 3: Create API Definition for Your API in Postman
In order to create API Definition for your new API, click on the + button in front of Definition. You will get two options:
- Import files
- Author from scratch
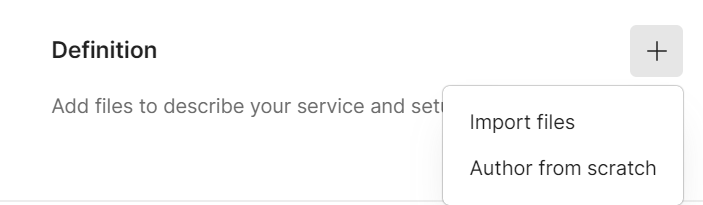
Since we want to create our API from scratch, we will choose Author from scratch option here.
After choosing this option, you will need to select definition type from a drop down list. There are plenty of available options. I prefer to choose OpenAPI 3.1 or OpenAPI 3.0 as these are the most popular options. You can even opt for RAML Specifications. RAML has a great popularity among MuleSoft developers.
Interested to learn about MuleSoft? Refer to My MuleSoft Tutorials
For Your API, you also need to chose a format–JSON or YAML. Both formats are popular and it is recommended to choose a format to which you are more familiar. That will help you to make syntax modifications more conveniently.
Another excellent option you will find is boilerplate template checkbox. Use this option if you want your API to be created with some basic skeleton and components automatically. It will help you saving some time without a need to write everything from scratch.
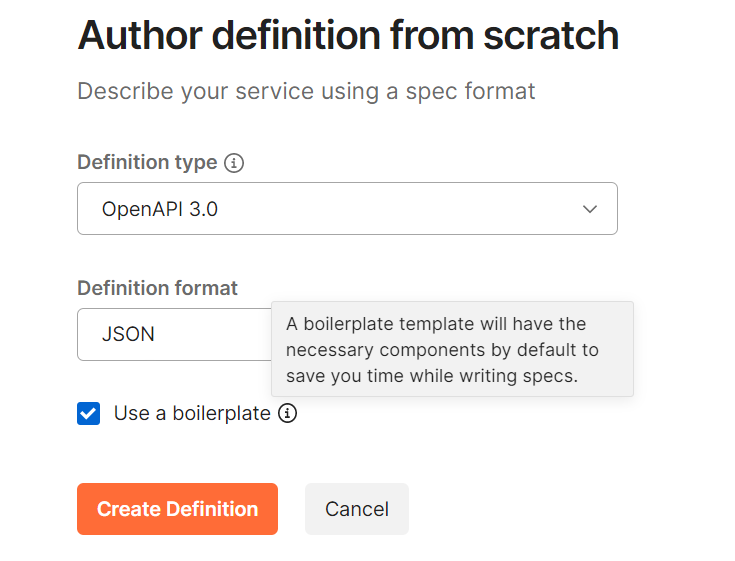
Just click on Create Definition to proceed with subsequent steps of API Specifications creation.
Step 4: Define API Endpoints, API Schemas, Components and Create API Specs
Now at this point your real game starts. From this point, you start defining all the necessary components of your API with OpenAPI 3.0 specifications.
You majorly perform following actions at this step:
- Update basic Info of your API by adding servers, contact details etc.
- Define Schemas to be referred and used as request, response structures.
- Define Endpoints (Paths) for all the resources of your API.
- Associate paths (endpoints) with HTTP Methods (verbs) like GET, PUT, POST, DELETE, PATCH etc.
Instead of explaining all these detail oriented steps here in written format, I prefer to share with you my video tutorial where everything from A to Z has been explained and demonstrated clearly.
I hope this Postman OpenAPI tutorial is helpful for you. You should now feel confident defining and designing your REST APIs using Postman. If you have any questions, feel free to write in below comments section. Happy learning!