Apache Kafka is a widely used and popular open-source Event-Streaming & messaging system with capabilities to handle huge loads of data with its distributed, fault tolerant architecture. In another Kafka tutorial, I covered Kafka Introduction, Kafka Basic Concepts and a high level overview of Kafka Architecture. In this Kafka tutorial, I will explain how to install Kafka on Windows, how to setup Kafka on Windows with a single broker & ZooKeeper (single node kafka cluster) and how to run kafka as a windows service in Windows 10. I will also explain and demonstrate how to create Kafka topics, how to publish message to Kafka Topic and how to Consume message from Kafka Topic.
Setup Kafka on Windows: Pre-Requisites for Installing Kafka on Windows OS
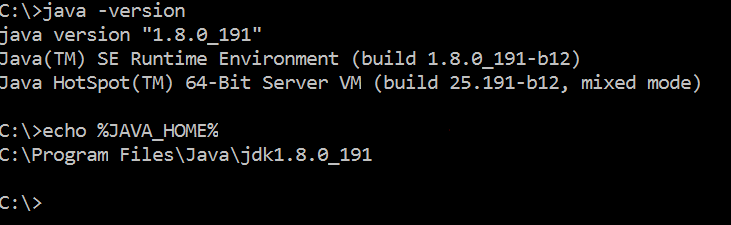
Java is the primary pre-requisite for installing and running Kafka. Install Java JDK 1.8 by downloading it from Official source (Oracle). Follow the instructions (wizard based steps) and complete Java Installation on your machine. Once Java is installed successfully, you can verify by using the command: java -version as this command will display details of your installed Java version if installation was completed correctly.
After that, set JAVA_HOME environment variable.
You need to add bin path to our Path variable as well.
Additionally, you should have some utility (e.g. 7zip) in order to unzip the setup once downloaded.
Step 1 Setting up Kafka on Windows: Download Kafka Setup
In order to download Kafka setup, visit download page on Kafka site and download binary for Kafka. At the time of writing this Kafka tutorial, latest binary version available is 2.6.0 and you can choose any scala version.
For a single node cluster basic setup, we don’t need to have a separate ZooKeeper setup as we will use ZooKeeper which is available in same Kafka binaries.
Step 2 Setting up Kafka on Windows: Create Directory Structure for Kafka Server and Extract Kafka Binaries
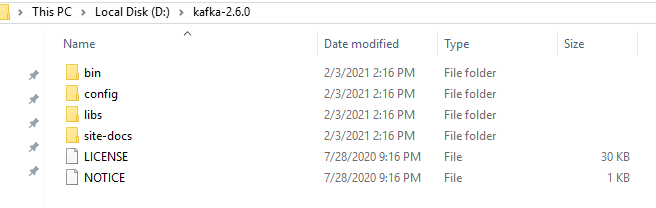
Once your download for Kafka is completed, you need to extract Kafka Binaries in a folder to be used as Kafka Home. Let’s create a new folder in D drive (You can choose directory according to your own preferences) and unzip Kafka binaries in that folder. So I will have my Kafka Setup extracted in D:\Kafka-2.6.0 as shown below:
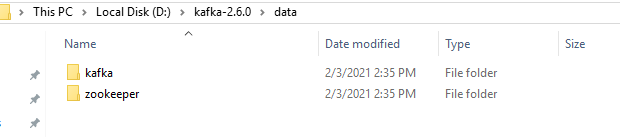
Now we need to consider ZooKeeper and Kafka Properties files and make any changes if we need. For example, if we need to specify any custom locations to store logs and data instead of default temp folders, we can do that. Let’s create a data folder inside our Kafka folder and inside that create separate folders for Kafka and ZooKeeper to store Kafka logs and ZooKeeper data respectively.
Now, we need to update configuration files to point to these newly created directories. To update Kafka configurations, open server.properties file and change logs location to newly created directory as below:
log.dirs=D:/kafka-2.6.0/data/kafka
Similarly, we need to change data directory for ZooKeeper by updating Zookeeper.properties file as below:
dataDir= D:/kafka-2.6.0/data/zookeeper
Step 3 Running Kafka on Windows: Start Zookeeper on Windows
Now we need to start ZooKeeper first in order to proceed with subsequent steps to complete Kafka setup on our windows machine. You can start zookeeper by running the bat script (zookeeper-server-start.bat) which is available inside bin\windows directory. In order to run zookeeper using this bat file, you will need to specify zookeeper configuration properties file as an argument as below:
First cd to D:\Kafka-2.6.0\bin\windows and then run:
zookeeper-server-start.bat ..\..\config\zookeeper.properties
Once zookeeper has started successfully, we can proceed with our next step to start kafka broker.
Step 3 Running Kafka on Windows: Start Kafka Broker on Windows
While keeping the zookeeper running, open another terminal and run Kafka broker using below command by specifying configuration properties file as an argument:
First cd to D:\Kafka-2.6.0\bin\windows and then run:
kafka-server-start.bat ..\..\config\server.properties
Once Apache Kafka (kafka Broker) has started successfully, we can proceed with the step to create kafka topic and testing message pub/sub events.
Step 4 Running Kafka on Windows: Create Kafka Topic
Kafka messages are stored in topics. Topics are virtual containers for the messages and pub/sub mechanism of Kafka server works using Kafka Topics. Kafka topic is basically a virtual group of one or more Kafka partitions in a cluster.
In order to create kafka topic, we will use below command (after cd to bin\windows directory):
kafka-topics.bat –create –topic tutorialspedia –bootstrap-server localhost:9092
Using above command, we created a topic with the name tutorialspedia. Please note that for bootstrap-server, you need to specify host and port as per your broker configurations. By default kafka broker runs on port 9092
You can verify created topic by running the command below which will list all available topics in your kafka server:
kafka-topics.bat –list –bootstrap-server localhost:9092
Step 5 Running Kafka on Windows: Publish Message to Kafka Topic
Open another terminal (with Kafka Broker and ZooKeeper running separately), and use below command to publish messages to our Kafka topic that was created in previous step:
kafka-console-producer.bat –topic tutorialspedia –bootstrap-server localhost:9092
Send a few messages to the topic and in another terminal, we will run a consumer (subscriber) to read the messages from the topic.
Step 6 Running Kafka on Windows: Subscribe Message to Kafka Topic
Run below command to start a consumer/subscriber for the kafka topic and start reading the messages:
kafka-console-consumer.bat –topic tutorialspedia –bootstrap-server localhost:9092
Test by sending few more messages from publisher terminal and you should be able to receive those messages immediately in consumer terminal.
How to Run Kafka As a Windows Service?
In this Kafka Tutorial, we are running Kafka Broker, Zookeeper and other scripts for creating topics, publishing messages to a topic and consuming message from a topic by opening separate terminals. What if we want to run our kafka server as a windows service? In this section I will explain how to install Kafka as a Windows Service. To be precise, you will learn how to run Kafka broker as a windows service and also how to run Kafka zookeeper as a windows service.
In order to install Kafka as Windows service, I will use a simple yet powerful utility known as NSSM (Non-Sucking Service Manager). We will use NSSM to create Windows Service for Kafka Broker and ZooKeeper.
Download NSSM and then install Kafka ZooKeeper as a service by running below command:
nssm install “Kafka Zookeeper”
A new window will open where you need to browse and chose D:\Kafka-2.6.0\bin\windows\zookeeper-server-start.bat and for arguments provide path to the configuration properties file (zookeeper.properties)
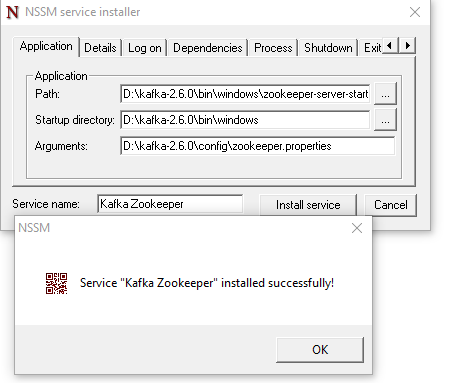
Service will get created and you will be able to see it in Services.
Simply start the service. (Please make sure that zookeeper is stopped from the terminal which you ran in previous steps before running it as a Windows Service to avoid port binding issues).
Next, we will run Kafka Broker as Windows Service by running below nssm command:
nssm install “Kafka Broker”
A new window will open where you need to browse and chose D:\Kafka-2.6.0\bin\windows\kafka-server-start.bat and for arguments provide path to the configuration properties file (server.properties )
Simply start the service. (Please make sure that kafka broker is stopped from the terminal which you ran in previous steps before running it as a Windows Service to avoid port binding issues).
Now you have both zookeeper and Kafka broker running as Windows Services. Test by publishing some messages from Publisher terminal and verify that consumer terminal is able to receive the messages.
Recommended Read: Kafka Interview Questions Answers for Developers
Pingback: Kafka Introduction, Kafka Architecture, Kafka Use-Cases & Concepts | TutorialsPedia
dataDir=log.dirs= D:/kafka-2.6.0/data/zookeeper this did not work but dataDir=D:/kafka-2.6.0/data/zookeeper worked
Thanks Ssheik for identifying the typing mistake. It was correct in the video tutorial but somehow got pasted incorrectly in the text. Has been fixed now.
Pingback: MuleSoft Kafka Integration: Mule4 Send Receive Kafka Message
HI Ajmal,
Thank you for the informative post. I found this very informative and it helped setting up Kafka broker and zookeeper in simple steps.
$ sh zookeeper-server-start.sh config/zookeeper.properties
mkdir: cannot create directory ‘/c/Users/compu/OneDrive/Desktop/kafka_2.12-3.3.1/bin/../logs’: Permission denied
[0.003s][error][logging] Error opening log file ‘/c/Users/compu/OneDrive/Desktop/kafka_2.12-3.3.1/bin/../logs/zookeeper-gc.log’: No such file or directory
[0.003s][error][logging] Initialization of output ‘file=/c/Users/compu/OneDrive/Desktop/kafka_2.12-3.3.1/bin/../logs/zookeeper-gc.log’ using options ‘filecount=10,filesize=100M’ failed.
Invalid -Xlog option ‘-Xlog:gc*:file=/c/Users/compu/OneDrive/Desktop/kafka_2.12-3.3.1/bin/../logs/zookeeper-gc.log:time,tags:filecount=10,filesize=100M’, see error log for details.
Error: Could not create the Java Virtual Machine.
Error: A fatal exception has occurred. Program will exit. Did not work as advertised Your input would be most welcome !!!