In one of my previous posts, I explained how we can develop SSL based secure SOAP Web Services in TIBCO. In this post, I will explain how we can achieve HTTPS based communication in TIBCO processes involving HTTP Palette (having HTTP Receiver as process starter).
Step 1: Generating Key Pair Using Porecle
Portecle is a graphical application for creating, managing and examining keystores, keys, certificates. For creating a key pair (public & private) to be used for https example here; I will be using this tool.
The process for creating the key pair and then exporting out public and private keys from it is explained below. You can also refer to my video tutorial explaining how to generate self signed certificates using Portecle.
From Portecle menu, choose the option tools–>Generate Key Pair, then choose key algorithm and also specify key size and then click OK. Generate Certificate window will open. specify certificate related details like validity duration, CN, OU etc and then click OK. Now give some alias to the key pair. Portecle will then ask you to set password for the keystore. This completes creation of the keystore.
NOW export public and private keys from the keystore to be used on server and client side respectively. For exporting private key, choose export option and then in the export type, select private key and certificates to export in PKCS#12 format. You will be prompted to key in the keystore password. After successful password entry, you will be asked to set new password for this private key file.
For exporting public key from the keystore in PKCS#7 format, choose Export and then select Certificate Chain in the export type.
Now we are done with export of both private and public keys from the keystore and we can proceed with the steps for using them in our TIBCO solution.
Step 2: Setup TIBCO HTTP Process with SSL Configured
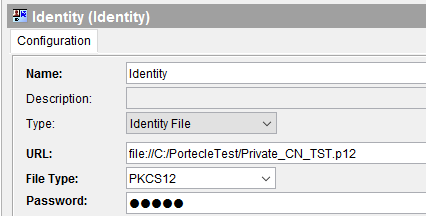
Create a TIBCO designer project. In the project, add a new Identity (from General Palette). Configure this identity by selecting the private key that we exported in previous step in PCKS12 format. Remember that the password should match the one that we entered while exporting this private key from the keystore.
The configuration of the identity will look like below:
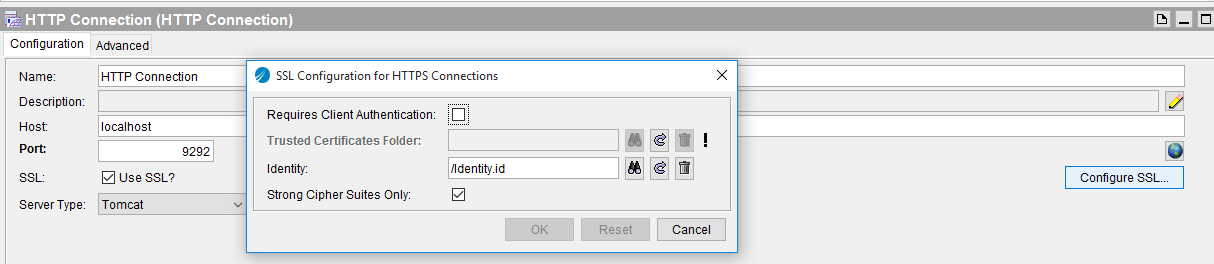
Now, create a new HTTP Connection and check Use SSL option in its configuration. In configure SSL, choose the identity file that we just created.
The configuration of the HTTP connection resource will look like below:
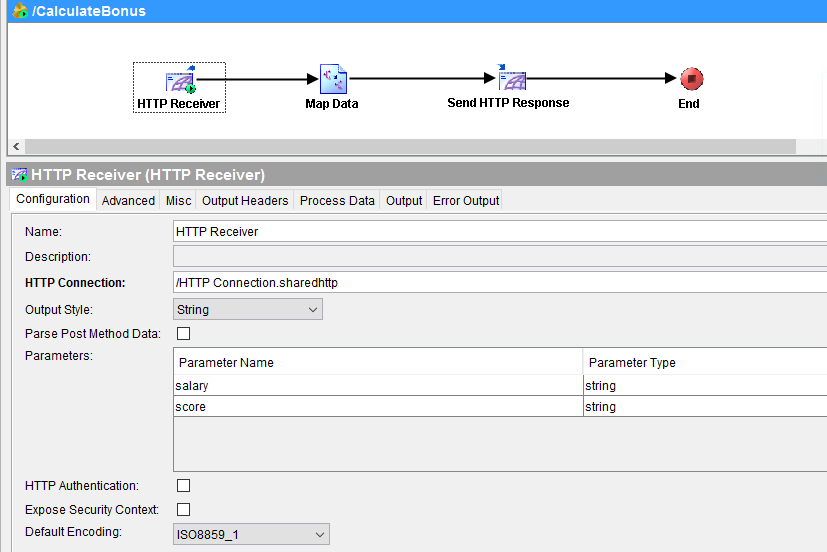
Now we have our HTTP Connection resource ready with SSL configurations. The next step is to create a process with HTTP Receiver as process starter. This process will make use of the connection that we configured. You can have any kind of implementation inside the process just for this testing purpose. I created the process very simple which takes salary and score as input parameters (GET) and then calculates the bonus amount and returns back as HTTP Response.
The process looks like below:
With this, our server side setup is completed. We need to now move to the step of setting up a client project which will call this process through https.
Step 3: Configure TIBCO Process to call a process using SSL
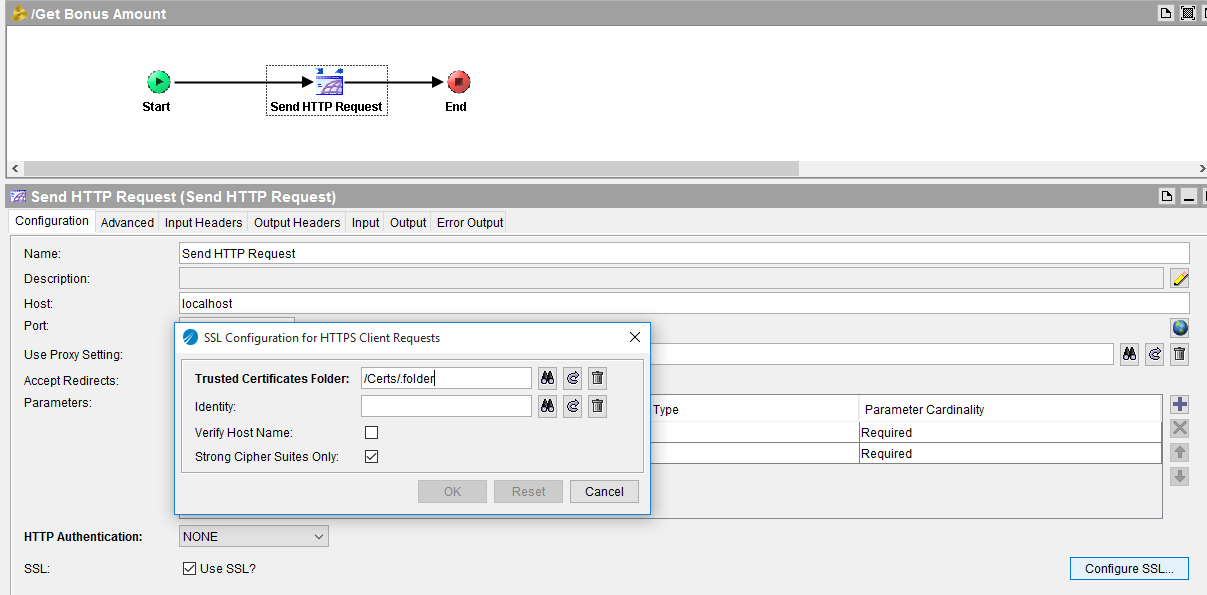
Create a separate project in TIBCO Designer. Then import the public key of the server (exported in first step) in the project in a folder in PEM format using Tools–>Trusted Certificates–>Import Into PEM format option.
Next, create a simple process which calls server process using Send HTTP Request activity. This activity should be configured as SSL enabled by checking the Use SSL checkbox and also specifying the certificate folder as shown below:
Step 4: Test HTTPS based communication in TIBCO processes
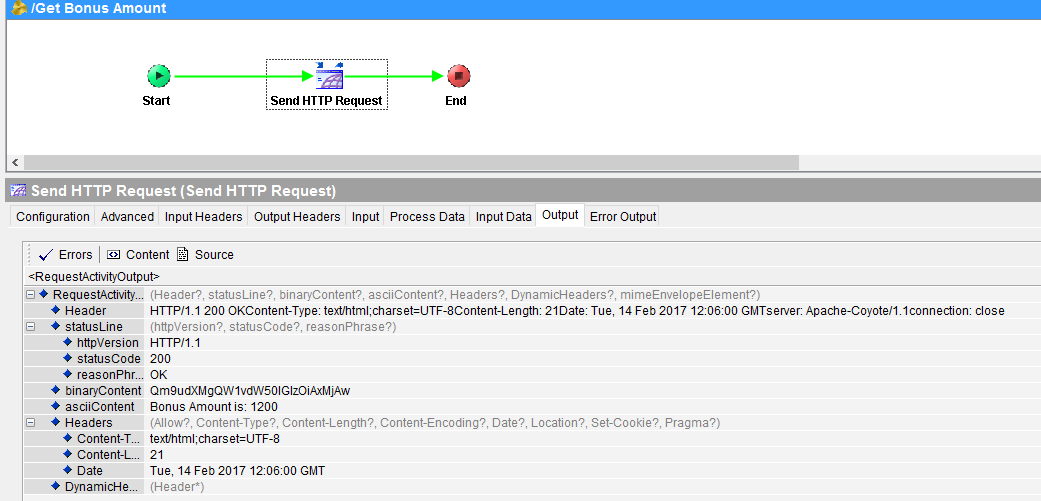
The last step for us is to run both server and client processes in designer tester and see how it goes. As you can see in below screenshot, the client process has successfully called the server process using https protocol and got the response as desired.
This completes the tutorial on using https for tibco processes. For any confusions, feel free to write a comment below.
Amazing Tutorials, Very easy and very useful for someone who is new to Tibco. Request you to add some more tutorials with some tricky use cases IT of industry standards.
Once again, thank you for helping out people like me, who are struggling to learn Tibco.