In TIBCO BW, Jobs are executed in separate threads and we often need to synchronize the job threads through communication between the jobs running separately in same engine or in separate engine.
In this TIBCO Wait and Notify step by step tutorial, I will teach you how you can use Wait and Notify activities in TIBCO BW processes for synchronization of processes.
Wait and Notify activities of TIBCO are similar to the concept of semaphores in other programming languages. A process containing a Wait activity waits for another process to execute a corresponding Notify activity.
For this tutorial, we are going to explore the process synchronization feature of TIBCO with an example scenario where one process will use a Wait activity before sending a HTTP response. Other process will be having a notify activity through which a response will be sent to the process having a wait activity.
Let’s proceed step by step to see how Wait and Notify is used for process synchronization in TIBCO:
Step 1: Add Notify Configuration resource in the project
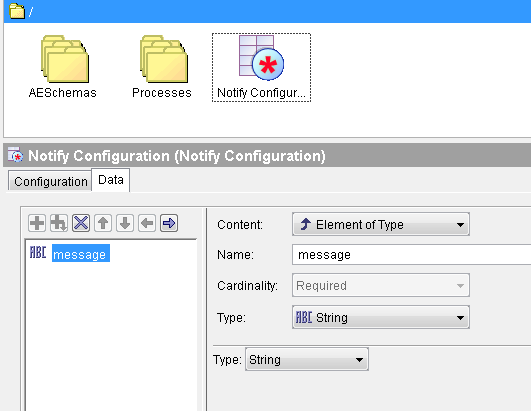
For passing data between executing instances of processes, Notify Configuration resource is used which specifies the schema for passing this data. Add Notify Configuration from the General Activities Palette. In this example scenario, I have kept it simple by having just a string element variable in the Data tab of this resource as shown below:
Step 2: Create a process with Wait activity
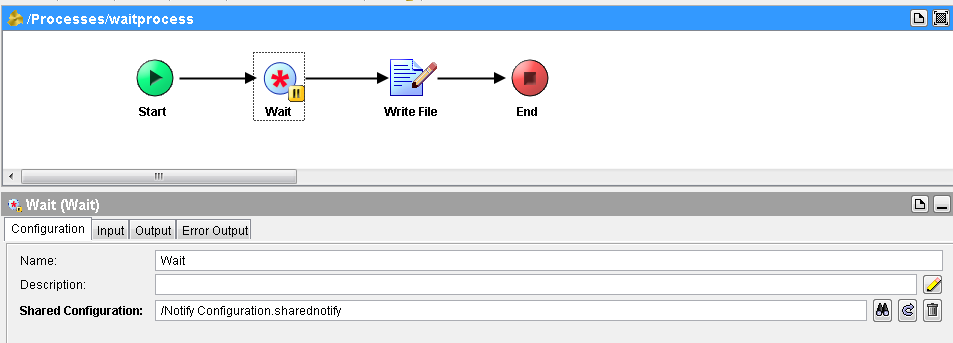
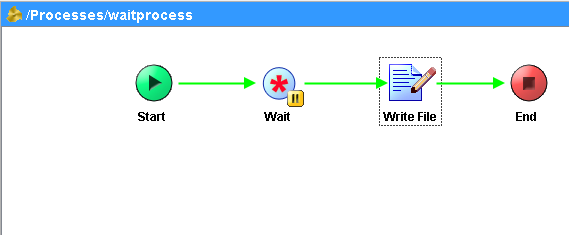
Let’s create a new process and call it WaitProcess. This process will wait for a notification from another process and It will write data to a file once notification is received.
Notify configuration that we created in Step 1 will be given in the configuration tab of Wait activity as shown below:
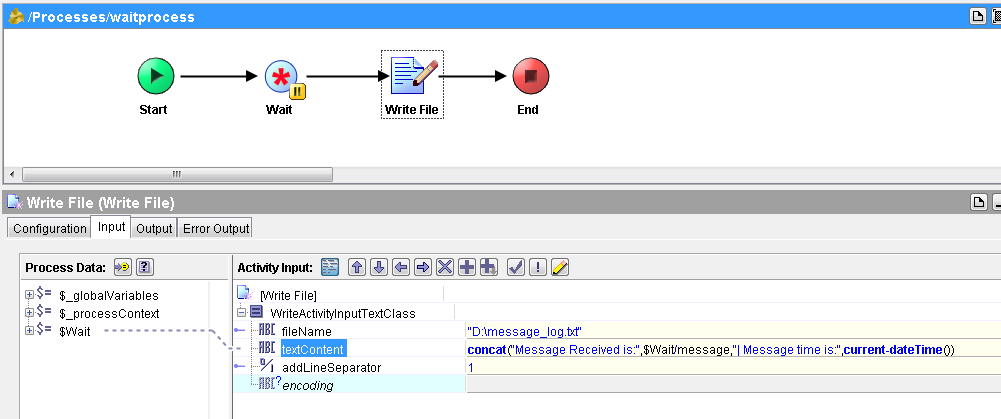
In the Write File activity, we are going to write the notification message received along with the time stamp to a file as shown in the screenshot below:
Step 3: Create a process with Notify activity
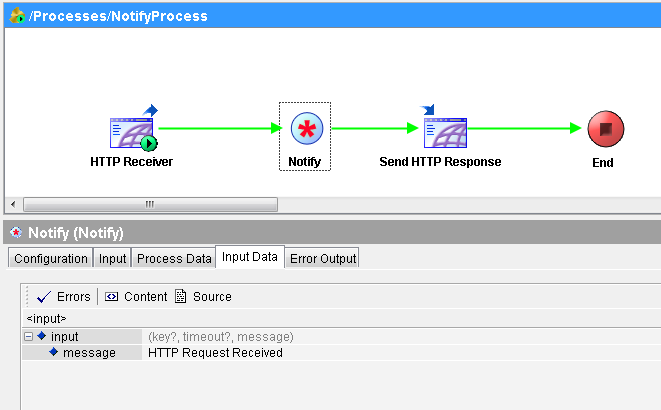
Our next step is to add another process in which we will be using Notify activity. For this example case, I am sending the notification upon receiving a HTTP Request.
In the Input tab of Notify activity, I am sending a message back to the process where we have a Wait activity as you can see in below screenshot:
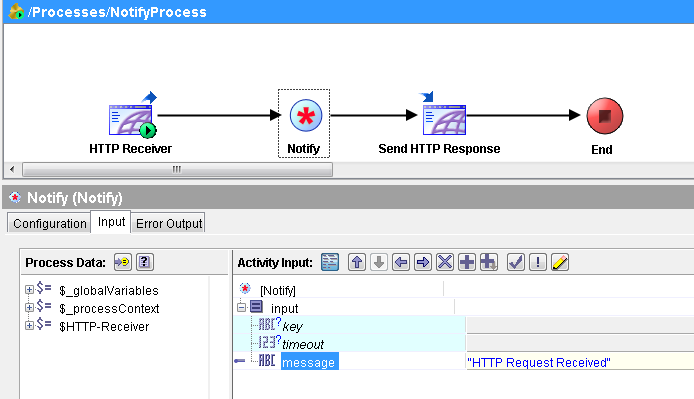
HTTP Receiver and Send HTTP Response activities in this process have been added only to receive a HTTP request and send some response back to the http request.
Step 4: Test Wait and Notify Based Process Synchronization
Once we have our processes with Wait and Notify activities ready, let’s proceed with testing using designer tester.
Load both processes in the tester and create a job instance for the WaitProcess. As you can see below process goes in a wait state at Wait activity:

Now let’s send a http request to the IP address and Port specified in the HTTP connection being used in the NotifyProcess. As seen below, process has run and It has sent back a notification using Notify activity to the process having a Wait activity:
Now if you look at the WaitProcess in the tester, you will see that Process has now run forward from Wait activity to the end as you can see below:
Now if you go to the path specified for the created file in the Write File activity, you will see that contents have been written successfully as shown in the screenshot below:
