Portecle is a user friendly GUI application for creating, managing and examining keystores, keys, certificates, certificate requests, certificate revocation lists and more. In this tutorial, I will explain step by step process to generate self signed certificate using Portecle. You will learn how we can create keystore and also how we can export public certificate.
Step 1: Create Key store
Before we create a key store using Portecle, let’s first have a brief go through for the basic concepts of a key store.
A Key store is basically a repository of security certificates. A KeyStore has following features:
Two types of entries: key entries for private keys and certificate entries for public key certificates.
* A key entry contains the private key and a certificate chain of the corresponding public key.
* Every entry has a unique alias name.
* Key entries are protected by separate passwords.
* keystore may have different implementations from different security package providers. Some examples are JKS, PKCS#12.
Now once you have fair idea about key stores, let’s create a keystore using Portecle.
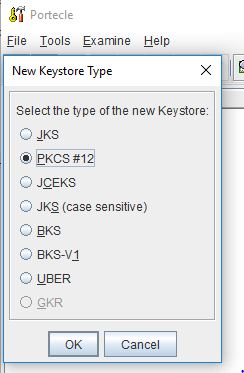
Open Portecle GUI and click on File–>New Key store. From the available options, we will choose PKCS#12 as key store type.
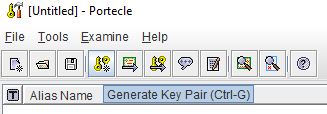
Next, we need to generate public, private key pair in this key store. Choose the option “Generate Key Pair” from the menu bar as shown below:
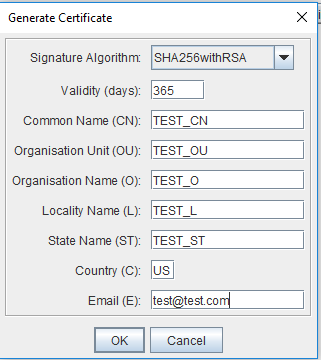
Choose a key algorithm (RSA or DSA) and also choose a key size from the drop down list. Another window will open where you will be asked to enter various details about the certificate. I am just filling these fields with some test values as shown below:
Click OK and then you will be asked to give an alias name for this key pair. Give it any name that you want. I named it as test_cn. You will get a confirmation message that Key pair is generated successfully.
Now you should be able to see this key pair listed with its alias name in your Portecle Window. By right clicking on this, you will observe many options provided by Portecle including Certificate Details (to see all details about the certificate), renaming the alias and also option to export. This export option is important for us as our next step will be to export public certificate from this keystore and also save our private key in PKCS#12 format.
Step 2: Export Public Certificate from Key store
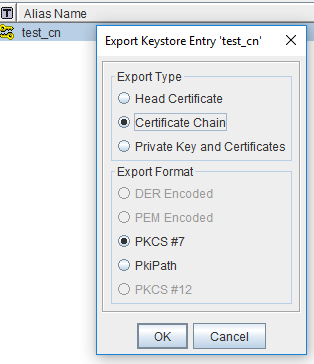
Right click on the key store alias and choose Export option. Since we intend to export certificate chain (public) from the key store, we will choose Certificate Chain from the Export Type. In the Export Format, we will choose PKCS#7 so that our exported certificate file will be in .p7b format.
Specify a folder location where you want to save your public certificate file TEST_CN.p7b
That’s it for saving the public certificate. Now this public certificate is the one that you will be sharing with any client that will be connecting to any service that you expose using its associated key.
Step 3: Export Private Key in PKCS#12 Format
When we save the keystore in PKCS#12 format, we save private key and associated certificates together in one file with .p12 extension. Choose Export and select “Private Key and Certificates” in the Export Type and PKCS#12 in the Export format.
You will be prompted to enter password for this keystore. Remember that this is the password you will need to open/import this keystore file anytime in any tool so make sure to keep the password remembered.
Once PKCS#12 keystore file has been saved to a location, the process of generating self-signed certificates and extracting public and private keys is completed.
Watch the below Video tutorial on my YouTube channel explaining the steps in detail.