In a previous video tutorial, I explained step by step how to implement a SOAP Web Service using MuleSoft Anypoint Platform. In this MuleSoft Consume SOAP Web Service tutorial, I will explain step by step how to consume a SOAP Web Service using MuleSoft.
MuleSoft SOAP Web Service Tutorial Implementation Scenario
In this step by step tutorial, we will implement a Mule application which receives a JSON Payload in HTTP POST containing two number values and invokes a publicly available calculator web service to perform addition of the numbers and then returns a customized response. We will implement our message flow by utilizing components from different modules including Listener, Choice Router, Message Transformer, Service Consumer etc.

Now let us proceed with our Mule4 Step by Step Tutorial for calling a SOAP Web Service from Mule Message Flow.
Step 1: Create a Mule Project & Configure HTTP Listener Connector
To implement SOAP Web Service Consumer Mule Application, first create a new Mule Project in AnyPoint Studio. For this, open Anypoint Studio and choose File–>New–>Mule Project. Give a name to this Mule Application and save it in your workspace by clicking on Finish. I named my Mule Project as soapserviceconsumertutorial. Once your Mule Project has been created, you will see that project structure with all folders have been created under Package Explorer.
Under src/main/mule (Flows), a Message Flow gets created by default with the same name as project. We will implement our consumer application in this flow.
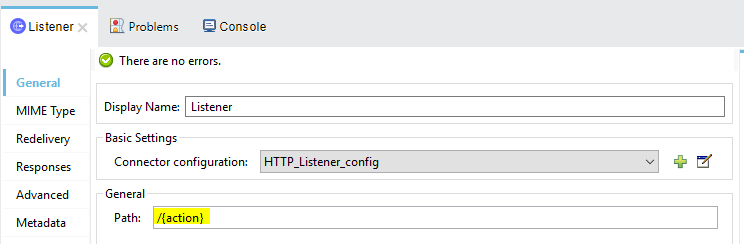
As the first major step, we need to drag Listener Connector from HTTP Module as this HTTP Listener will act as the entry point of our Message Flow.
Under General Configurations of Listener, specify host and Port of this HTTP Listner by clicking + button in front of Connector Configuration. Specify host and port on which you want this service to listen. By default it will listen on localhost and port 8081. I changed the port to 9095 for my service. You can choose any available port and use Test Connection button to verify if connection configurations are fine.
For Path, we will configure a URI Param by specifying it in curly brackets. I have added a URI Parameter with the name action which will be passed by the client when invoking the service.
There are two more things which we need to configure for our HTTP Listener Connector as below:
- For Mime Type, choose Application/JSON from the drop down list as we want to receive input data in JSON format.
- In Advanced Tab, for Allowed Methods, specify POST as we want to ensure that service accepts only HTTP POST data and no other verb.
Now we can proceed to our second step of mulesoft soap web service consumer tutorial.
Step 2: Use Set Variable to Save URI Parameter in a Flow Variable
As we have configured our HTTP Listener connector with a URI Param with the name action, we need to populate its value in a variable so that we may use it subsequently in our Message Flow to take actions accordingly,
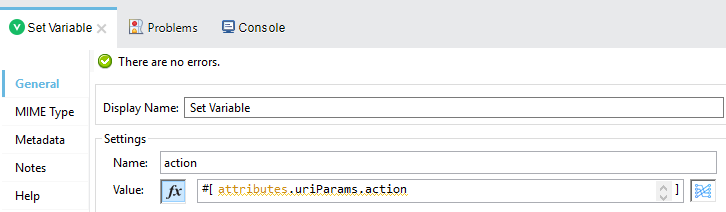
To Save a variable, we will drag Set Variable component from Core Module. Name the variable as action (you can name it anything) and populate the value by using the below expression:
#[attributes.uriParams.action]
Step 3: Consume SOAP Web Service Based on Choice Router Conditions
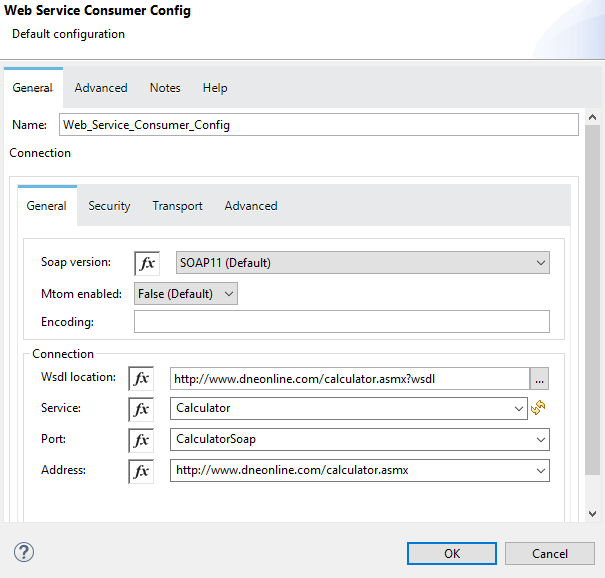
We will use calculator web service available online on the URL (http://www.dneonline.com/calculator.asmx?wsdl) in our tutorial and will invoke its add operation when user sends a request with add action. This operation will add two numbers and will return a result.
For this content based routing scenario, we will drag Choice Router in our message flow. For the When condition, we will use below condition by using the value that we saved in variable in previous step:
[vars.action==”add”]
Whenever above condition is met, we will invoke calculator web service operation. For calling the operation, we will add Consume component from Web Service Consumer Module. In the General Tab of Consumer Configuration in basic setting section, Connector is configured by clicking on + button in front of Connector Configuration.
Once you click + button a new configuration window will open where you will specify calculator public service wsdl for wsdl location. All corresponding fields (service, port, address) will get populated automatically based on the configurations available in the wsdl file.
Click Ok and proceed back to the General Configuration of Consumer. For Operation, select Add from the drop down list as drop down list will show you all operations which are available in online calculator service.
Once we have configured Consume component, we need to add Transform Message component before it in our Message Flow where we will configure input for the operation.
For Transform Message component, we will specify input data for intA and intB numeric elements which are inputs of calculator Add operation. These values will be fetched from payload as you can see below:
![]()
The next action that we want to perform is to transform and customize our response message. For our service, we want to send a response in XML format after calling calculator by specifying Operation and Result in our response body. For this purpose, we will add a Transform Message component in our flow after Consume. For this Transformer, define meta data by choosing the option of XML and then XML Example file and specify the xml file which contains data as below:
<Result>
<Operation> Add </Operation>
<ResultValue> 55 </ResultValue>
</Result>
Now specify the transformer mappings as below so that action value gets populated in opeation field and ResultValue field gets populated by the add operation response from calculator service.
![]()
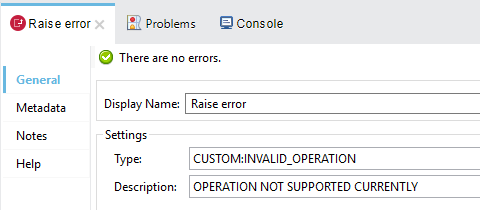
Now our last action is to take care of default flow of our choice router. For default, drag a Raise Error component as we want to throw an error back to the client for any operations other than add.
Custom Error is returned from Raise Error with configurations as below:
With this, we are now done with all major implementations of various components in our message flow and we can now proceed to our next step where we will test our mule application.
Step 4: Test Mule Application For SOAP Web Service Consumer Flow
To test mule application, run it by clicking Ctrl+F11. Once application is running and status is shown as Deployed in Console, hit the service from PostMan as below with JSON input and choosing POST Method:
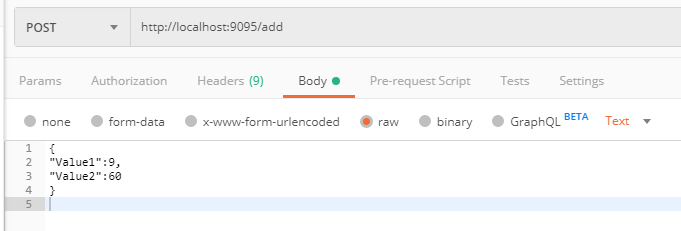
The response is received as below with operation name and result value:
<?xml version=’1.0′ encoding=’UTF-8′?>
<Result>
<Operation>add</Operation>
<ResultValue>69</ResultValue>
</Result>
Don’t forget to subscribe TutorialsPedia Youtube channel and Feel free to comment below if you have any questions or anything to share.
Can you explain the same for the Web service response having attachments
It would be nice if you actually showed where to drag this stuff on the canvas for us newbs. I appreciate the tutorial, but it is a bit hard to follow if you have never used AnyPoint platform before.