MuleSoft’s Mule ESB is one of the popular ESBs available in the market which as part of Anypoint platform enables designers and developers to create Mule Applications to integrate different systems and applications which are then deployed and run on Mule Runtime. Mule Applications containing Integration Flows are implemented in a graphical Eclipse based IDE known as Anypoint Studio.
In this MuleSoft Tutorial for Beginners, we will explain how to implement a simple Integration Flow in Mule using Anypoint Studio by using HTTP Listener connector and using Choice Flow for content based routing. This is a beginner level Mule ESB tutorial without going deep down into more advanced concepts and features.
Mule ESB Beginners Tutorial Sample Scenario
For the simplicity of this tutorial, we will implement a very basic scenario where we will expose one HTTP GET service on a specific port and we will expect a Name as Query Parameter and using choice flow for content based routing, we will return a response message whether a user with given name is authorized or not. We will also use Logger component to log payload as well as request’s parameter.
Mule Beginners Tutorial Step 1: Create a Mule Application Using Anypoint Studio
In order to Run Anypoint Studio, you need to ensure that you have Open JDK also installed in your machine. Once Open JDK is installed and Anypoint Studio has been extracted, you can start Anypoint Studio by clicking on AnypointStudio.exe file from the extracted folder. Choose your workspace where your Mule Projects will be saved.
To create a new Mule Project, from the menu bar choose File–> New–> Mule Project. Give a name to your project and choose Mule Runtime. For this tutorial, I specified the name of the project as hellofromtutorialspedia.
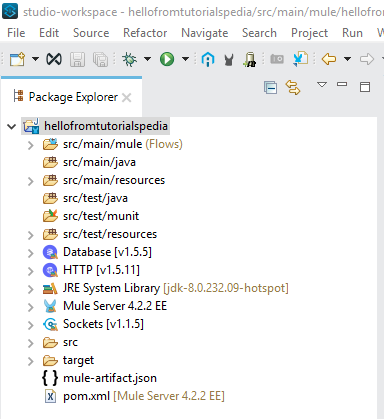
Once created, your Mule Project under Package Explorer will have directory structure as below:
Mule Beginners Tutorial Step 2: Create a Mule Flow With Choice Router
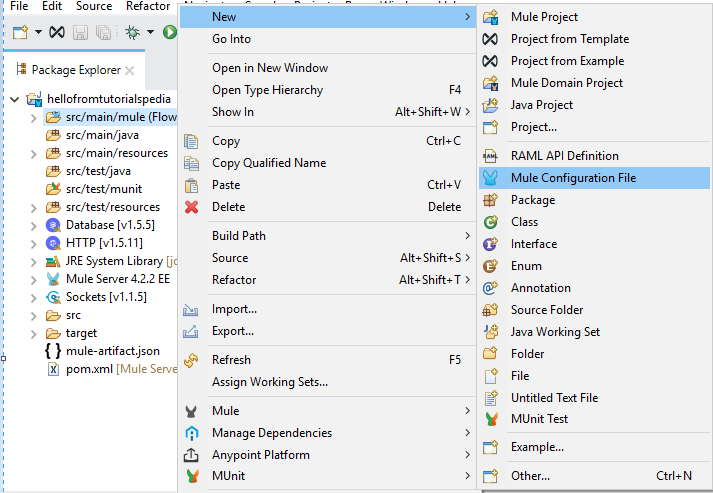
Mule Flow can be designed by adding a new Flow under src/main/mule by right clicking on this folder and choosing Mule Configuration File as seen in the screenshot below:
This Configuration XML File has a Message Flow tab where you can design your flow by dragging components from Mule Palette area. Alternatively you can also open it in XML format and any changes done in XML also work.
Open the Configuration File in Message Flow and drag Listener from HTTP Module. Now we need to configure the listener. Under General, specify path as welcome and then Click on + button for Connector Configuration and specify Host and Port. Choose any port which is not in use. I chose localhost as Host and 9099 as Port. You can click on Test Connection and you should get a success if connection can be established on the given Host and Port.
Next I clicked on Advanced and for Allowed Methods, I chose GET so that our service only accepts request with GET Verb.
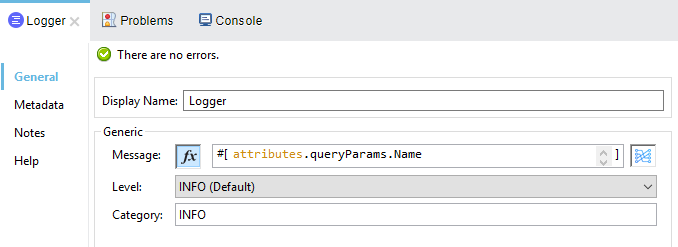
Now Add a Logger so that request query parameter received is logged and becomes available in Console Output once we run our application. As you can see below, for Logger configuration, I have specified Expression for logging query parameter with the name “Name”:
Next, I added Choice Router from Core Module. This Choice router will be used for content based routing by providing if/else like options. We will return different messages by setting different PayLoad values depending on the value of the query parameter “Name”.
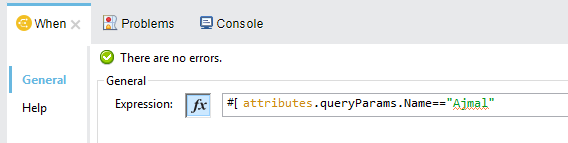
For this, Add Set Payload Transformer component from Core module under for both conditional and default options of Choice router. For Content Based routing, we will write below Expression for our Conditional scenario:
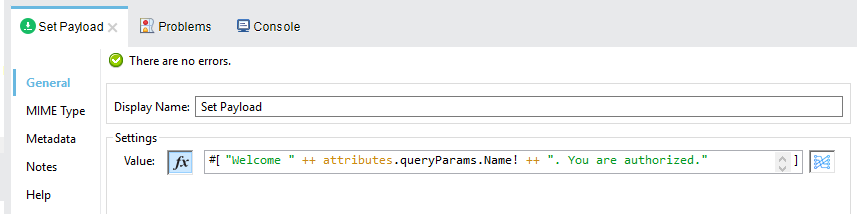
Under this, for our Set Payload Transformer, we will create a response message stating that this user is authorized as you can see below:
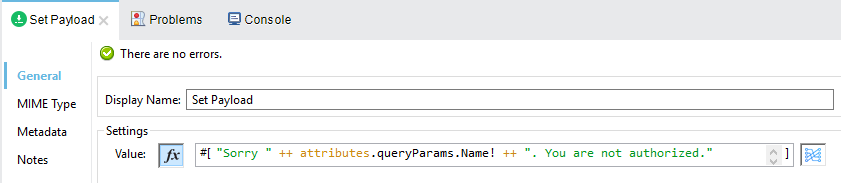
Now, for Set Payload under default section, we will create response payload as below:
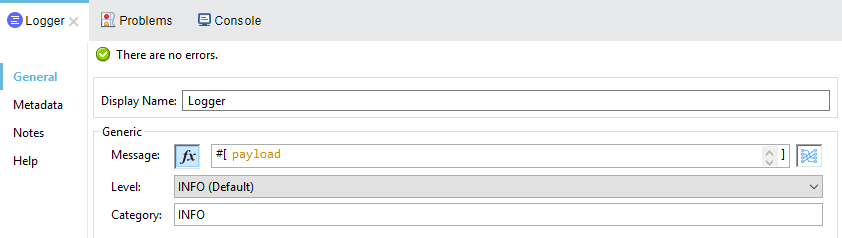
Now in order to keep our response Payload in logs and to show the payload data in console output during our testing, we will add another Logger and for this logger configuration, we will specify payload as Message as shown below:
This is a very simple scenario and in real scenarios you won’t be doing as this and you will have many components in your flow to interact with databases, files, JMS etc but we won’t be covering such advanced things here and we will just test our scenario now in next step.
Mule Beginners Tutorial Step 3: Test Mule Application in Anypoint Studio
In order to test the flow that we implemented, Run your Mule Application in Anypoint Studio by choosing Run from the menu or by using shortcut Ctrl+F11. Mule Application will get deployed in Mule Runtime Engine and you will be able to see details in Console Output.
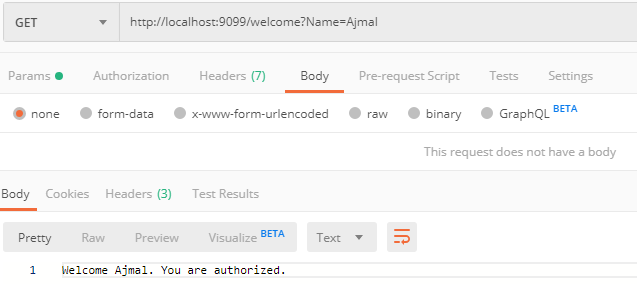
Once yous see the status of the Application as Deployed, you can now hit the service and test it. For our HTTP Listener based application, we will test the service by hitting the URL http://localhsot:9091/welcome?Name=?? where ?? will be replaced by different names to test.
As you can see in the screenshot below, when I tested by passing Ajmal as query parameter, I got the response stating that user is authorized and got another response stating the user is not authorized with a different query parameter:
I hope this basic beginners tutorial for Mule will help you and feel free to comment below if you have any questions. For more tutorials, you can refer to TutorialsPedia YouTube Channel where I have dozens of videos covering different topics related to MuleSoft and other integration related technologies.