TIBCO SmartMapper is a tool provided by TIBCO which extends functionality of TIBCO BW by supporting Lookups and cross referencing in an efficient way. Using SmartMapper, relationships are created between multiple application entities.
In this TIBCO BW SmartMapper Lookup Tutorial; I will explain how we can create ER Model, create relationship between entities in multiple applications, load mapping data through a seeding process and then perform lookup operations from the seeded data using Smart Mapper activities.
Please note that you need to have TIBCO BusinessWorks Smart Mapper Plugin installed in order to complete this tutorial. This plugin will add required Smart Mapper Palette in your TIBCO Designer which will provide different activities required to complete this tutorial.
Business Scenario:
For this tutorial, I am taking a scenario where we have Application X and Application Y both having Product data. However, Products in both applications are identified by different Product IDs specific to each application. We need to have a lookup process so that we may rightly map between the products with respect to product id in Application X and Application Y.
For this purpose, we will develop our solution using SmartMapper so that when our TIBCO process received Application X Product ID, we may lookup for a mapping of corresponding Product ID and Product Price in Application Y.
Now Let’s proceed step by step with TIBCO SmartMapper Tutorial.
Step1 : Create ER Model
Creating ER (Entity Relationship) model is the first thing that we need to do. This Model will specify all the applications, their entities, associated schemas as well as storage service details.
To create ER Model in your TIBCO BW project, drag SmartMapper ER Model from SmartMapper Palette into your project design panel. If you go inside it by double clicking; you will see three folders inside. A folder each for Applications, Relationships and Storage.
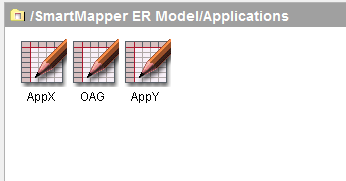
Go inside the Applications folder and add three new Applications from SmartMapper Palette. Name these applications as AppX, AppY and OAG as shown below:
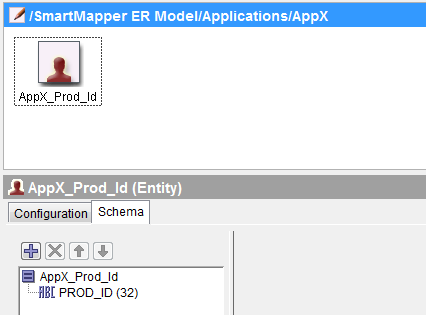
Now we need to add entities to each application. Double click on AppX and then add Entity in it. I named it as AppX_Prod_Id. In the schema tab of this entity, add a new schema element with the name PROD_ID as shown below:
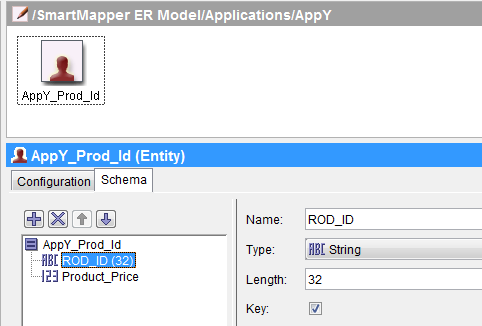
In a similar way, add a new entity for AppY as well. For the entity of AppY, I have defined two schema elements as I want to get Product Price as well. Schema configurations of this entity are shown in the below screenshot:
In same way, add entity for OAG application as well. For this application, check the option for TIBCO-Managed entity in the configuration tab.
Now we are done with the configurations of all the applications. Next we are going to define relationships in the Relationships folder.
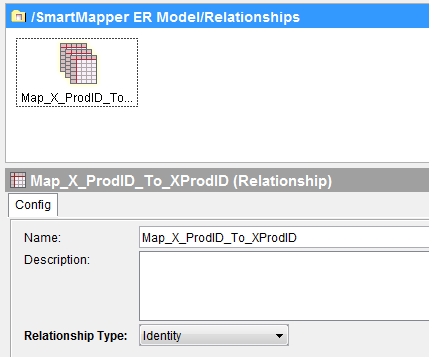
Add a new Relationship from SmartMapper palette. In Relationship Type drop box, choose Identity as shown below:
Now go inside the Relationship by double cliking on it and then add three participants in it for all the three entities that we created in the previous step. Make sure that you choose correct entity for each participant in the configuration tab.
Now we need to choose a Smart Mapper service for our solution. For this tutorial example. I am choosing File-Based SmartMapper Service so that we can use file based seeding of the mapping data.
Drag File-Based SmartMapper Service from the SmartMapper Palette in Storage folder. In the configuration of this service, specify a file where you want to store mapping data for this service. Also check the Active button as we want to keep this service active for our project.
With this, we are now done with the ER Modeling of our applications, their relationships and the storage service configurations. We can now proceed with subsequent steps to actually seed the data and then perform the lookup.
Step 2: Seed Data in ER Model
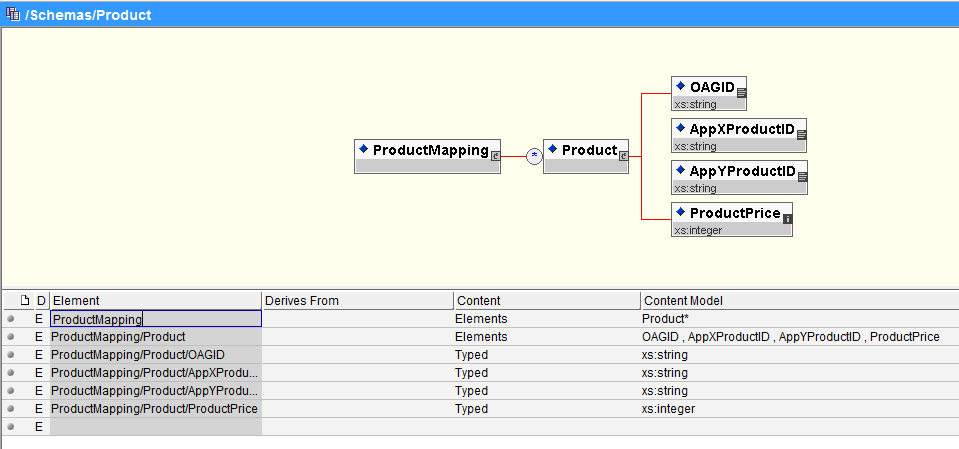
Once we have our ER Model ready and properly configured, we need to load mapping data in it which can be later used for lookup operations. The data that I am loading is based on a schema Product.xsd that I have created in the Schemas folder as shown below:
Based on the above schema, I have created a mapping file with the name ProductMapping.xml which contains mapping data for products for ApplicationX and ApplicationY.
<ProductMapping>
<Product>
<OAGID>LAPTOP-PROD</OAGID>
<AppXProductID>PRD123</AppXProductID>
<AppYProductID>LAPTOPZK4</AppYProductID>
<ProductPrice>9400 </ProductPrice>
</Product>
<Product>
<OAGID>PC-PROD</OAGID>
<AppXProductID>PRD125</AppXProductID>
<AppYProductID>PCR210</AppYProductID>
<ProductPrice>5400 </ProductPrice>
</Product><Product>
<OAGID>CAM-PROD</OAGID>
<AppXProductID>PRD220</AppXProductID>
<AppYProductID>CANON569</AppYProductID>
<ProductPrice>560</ProductPrice>
</Product><Product>
<OAGID>SMART-PROD</OAGID>
<AppXProductID>PRD230</AppXProductID>
<AppYProductID>TOSHIBA908</AppYProductID>
<ProductPrice>1200</ProductPrice>
</Product><Product>
<OAGID>LED-PROD</OAGID>
<AppXProductID>PRD555</AppXProductID>
<AppYProductID>DELLP50</AppYProductID>
<ProductPrice>555</ProductPrice>
</Product>
</ProductMapping>
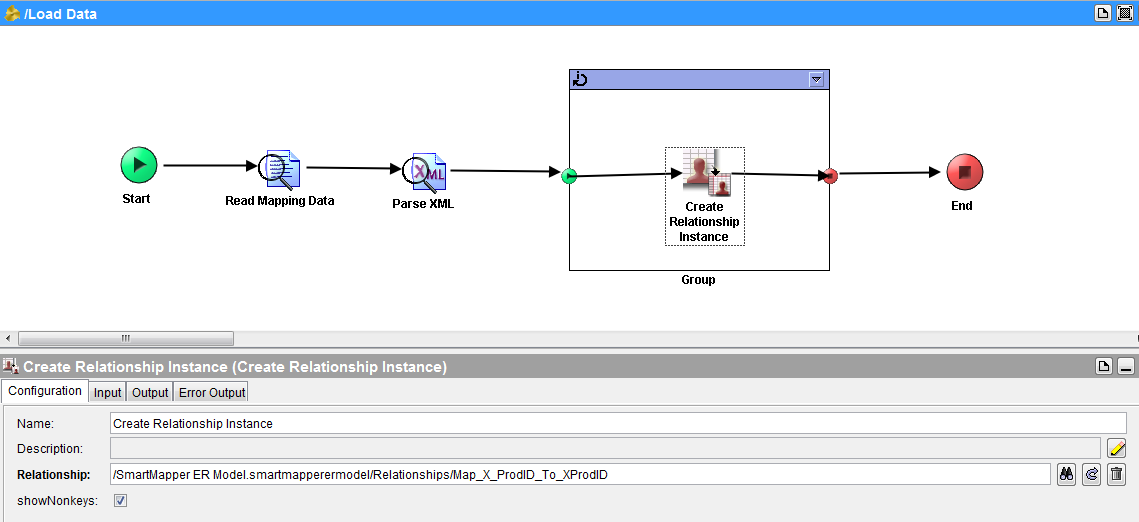
Once we have our Schema and XML mapping finalized, we can design a process which will read the XML data from the file, parse the data against given XSD to validate it and then in a iterate group, It will seed/load data by using Create Relationship Instance activity as shown in the below screenshot:
Load the above process in designer tester and run it so that data from the XML mapping file is seeded into the ER Model.
As you can see in below screenshot, process for loading data into ER model has run successfully and mapping data is seeded:
Step 3: Lookup for Mapping data from ER Model
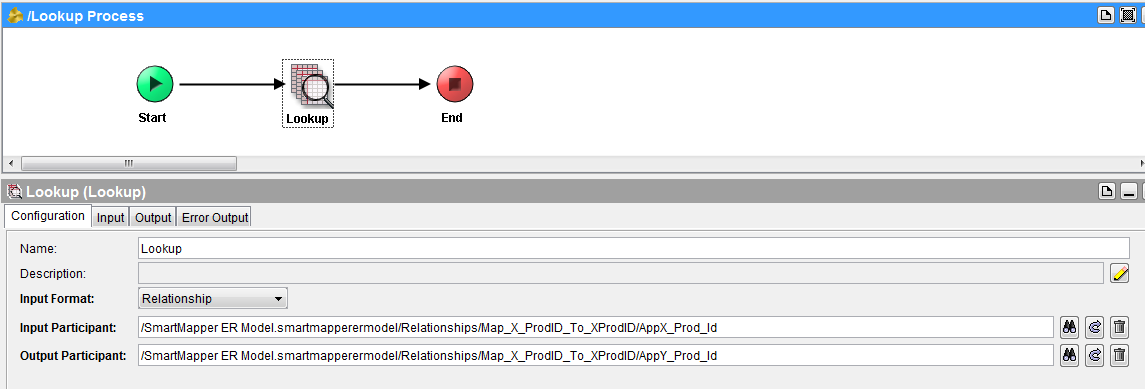
To lookup for product id and price from ApplicationY based on ApplicationX product id, we design a simple process here in which we are going to just use Lookup activity from SmartMapper Palette.
In the configuration of Lookup activity, specify AppX and AppY participants as input and output respectively as shown below:
In the Input tab of this Lookup activity, I am just hard coding ApplicationX product Id (use a ProductId which was present in the mapping XML seeded in previous step, otherwise you won’t get the results required).
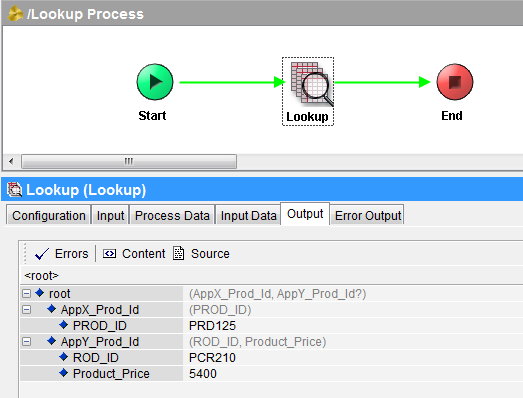
Now, load this lookup process in designer tester and run it. As you can see in below screenshot, we have got the required output by looking up from SmartMapper ER Model’s seeded data:
This completes our tutorial on SmartMapper Lookup operation. Feel free to contact/comment for any queries or inputs. Thanks





hello ajmal,
plz let us know how to get this Smart Mapper Plugin and how to install in bw.
it will be helpful to know this scenario.
Hi Ajmal
Do we have to load data every time in case of server bounce?
What i believe is this might be help full for may be 1000 or 10000 records as it keeps in memory. but what about when we have millions of records e.g. same product launch in different continent?
will it not be easy to create master data linkage and run query in place of keeping in memory and load it every time in case of server bounce?
As this involves much more configurations compare to simple query
Thanks
Hi Ajmal ,
Thanks for explaining smart mapper in a very good way . Can you explain Generate Key activty more plsss.
Regards
Hi Ajmal,
Pretty good explanation, can u plz do the same with JDBC storage based mapper.
Thank you.