FTP is a protocol used to transfer files between hosts remotely connected over TCP. In TIBCO, we can write business processes for establishing FTP connections with remote hosts and transferring files from and to remote servers. In this TIBCO FTP Get Activity tutorial, I will explain you step by step how you can connect to a remote ftp server in TIBCO and then get a file from the server and store it locally on your machine.
Step 1: Create FTP Connection In TIBCO
To create a new FTP Connection in your TIBCO BW project, go to Add Resource –> FTP –> FTP Connection.
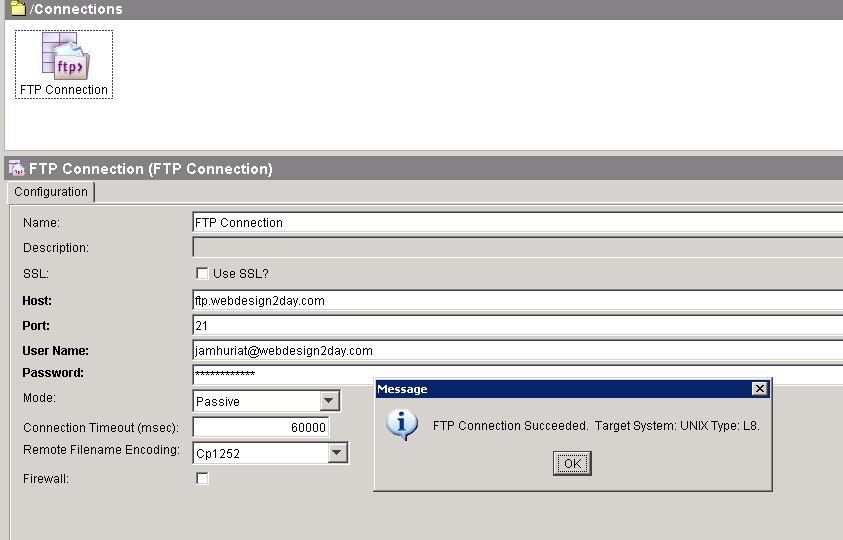
In FTP Connection, specify FTP Host, Port, Username and Password. For this tutorial, I have used a ftp server of a website for which I have ftp access. You need to have an access to some FTP server to access and connect.
Once you have given all required configuration parameters to FTP connection, use Test Connection button to test if it gets connected to FTP Server successfully. As you can see in the below screenshot, my connection to FTP Server is successful.
Step 2: Create TIBCO Process to Get Remote File Using Get FTP Activity
After successfully establishing FTP connection, now our next step is to create a process to use this FTP connection. Create a new TIBCO Process and use Get FTP activity in the process. I have kept the process very simple by adding only Get FTP activity without using any other activities in the process. In Get FTP configuration, choose the FTP connection that we created in Step 1. In the Input of Get FTP activity, we specify the name of remote file and local file where its contents will get saved. All other parameters like Host, Port, User, Password etc. are kept empty by me as they have already been configured in FTP connection. Specifying any of these parameter values here simply overrides those configured in the FTP connection.
After configuring Get FTP activity and validating the process, process looks like below:
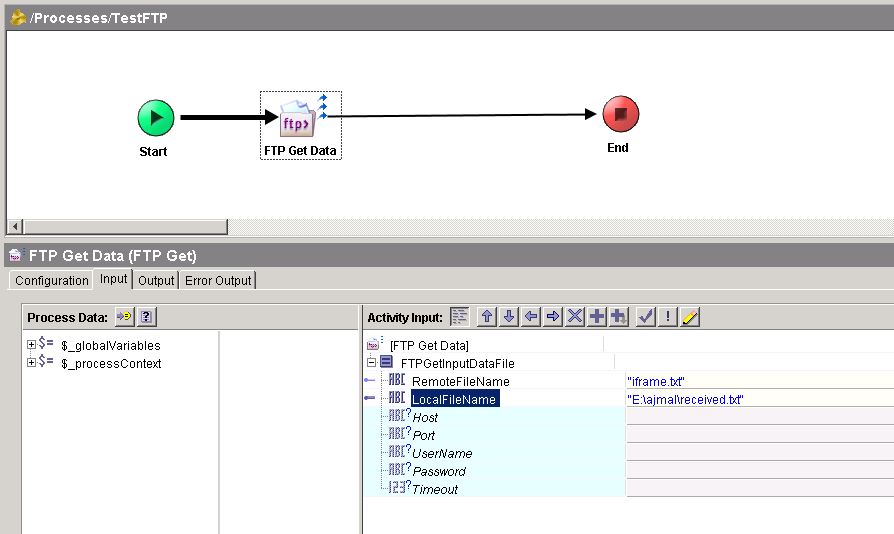
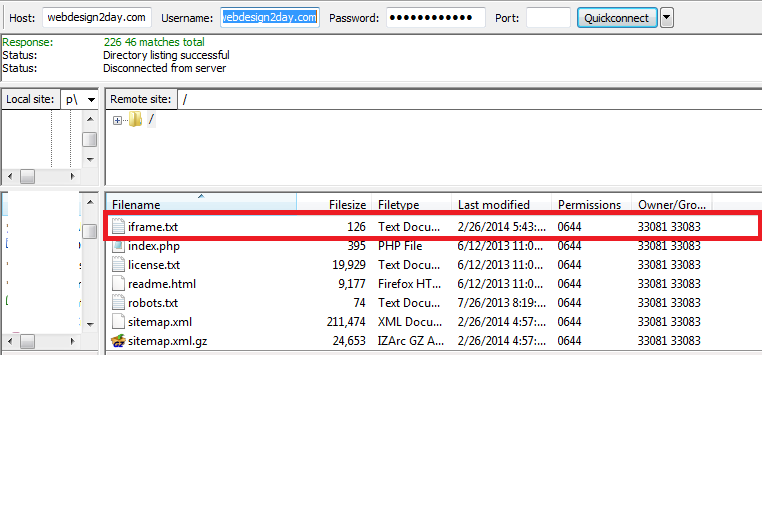
The process has been configured to get the file “iframe.txt” which is located at the FTP server and to store it at a local path with the name “received.txt”. You can see in below screenshot that file is present at FTP server to which connection has been established:
Step 3: Test FTP Process in TIBCO
In order to test that our process correctly does its job, we load the process in TIBCO Designer tester and start it. As you can see in the screenshot below, process has run successfully.
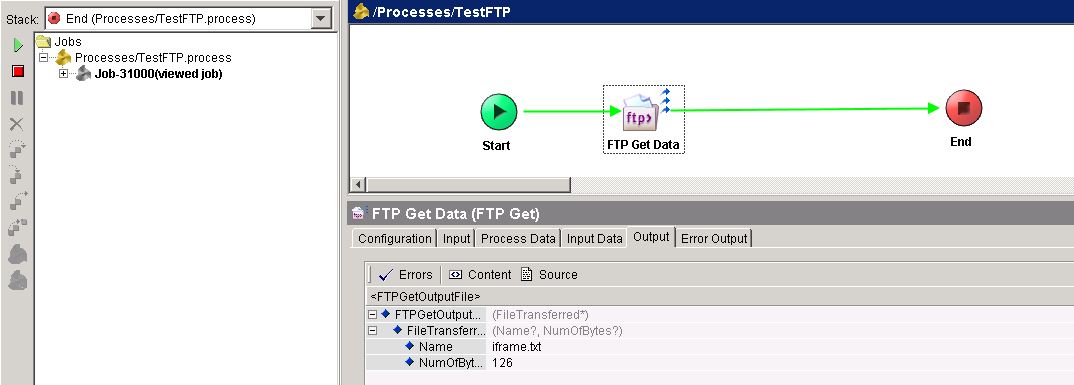
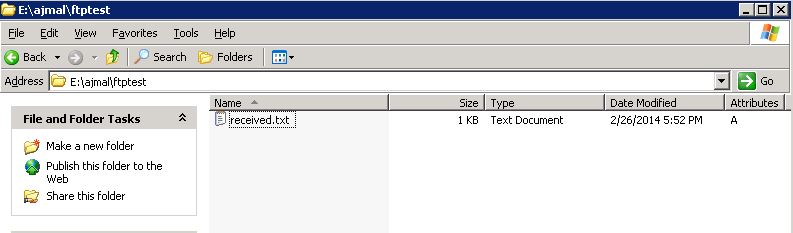
From the screenshot below, we can see that file has been generated at the specified location with the data received from FTP server.
In the next tutorial, I will explain how we can put files to FTP server from TIBCO process.
How get multiple files though ftp get activity????and how to use Mget command in ftp palettes????