TCP (Transmission Control Protocol) is a connection-oriented protocol which is used to send and receive data packets over a network in a reliable and orderly manner. TIBCO BW provides a separate Palette for TCP activities which can be used to design TIBCO processes for TCP based communication. In this TIBCO TCP Tutorial, I will explain how we can develop client server based TIBCO applications to transfer data packets through TCP protocol.
TIBCO TCP Tutorial Example Business Scenario:
For this tutorial example, I am going to design a simple client-server application in which Client will send the contents of a file to a server over TCP connection. Server will respond with with a confirmation message once It has successfully received and read the file contents.
With this simple scenario; let’s now proceed step by step to develop TIBCO TCP processes:
Step 1: Create TCP Connection Shared Resource
For TCP communication between two TIBCO processes (Client and Server), we need to have a TCP connection resource available in our project. Add TCP Connection from TCP Palette in your project.
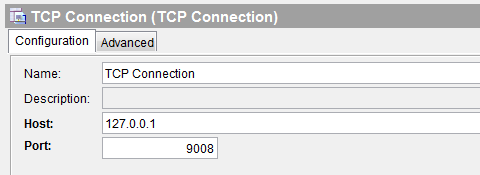
In the Configuration tab of TCP Connection, specify the Host and Port. You can specify any open port for this connection. In my case configuration of TCP Connection is shown in the below screenshot:
Step 2: Create TCP Server Process
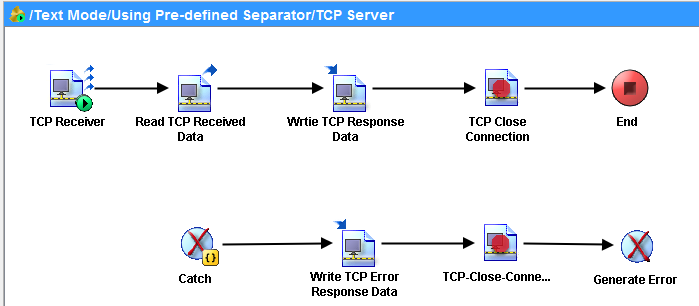
The server process will receive TCP data over a TCP Connection, will read the received data and upon successful data reception; It will send back TCP response data and then close the connection.
In case of any exception, Exception will be caught and a Error TCP response will be sent back and then connection will be closed.
Based on above description, our TCP Server process will look like below:
Now let’s go one by one with the important activity configurations and input mappings.
In the TCP Receiver activity, we specify the TCP Connection to be used as shown below:

In the configuration tab of Read TCP Data activity, choose the type as Text. We also specify Separator here from the drop down list. The configuration tab of this activity will look like below:

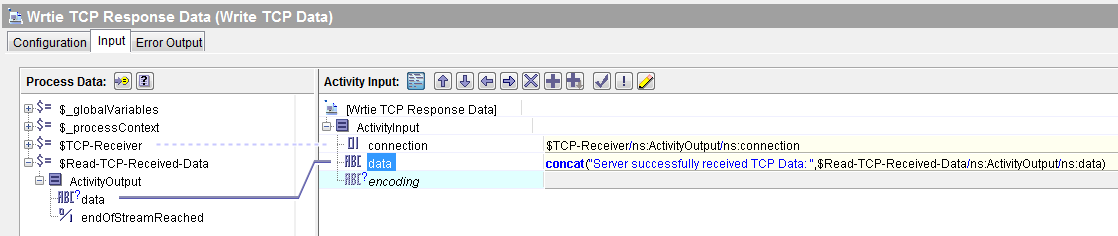
In the Input tab of Write TCP Data activity, we write response data to be sent to the client. In this case, I am concatenating a success message with the received/read data and sending it back to the client as you can see in the screenshot below:
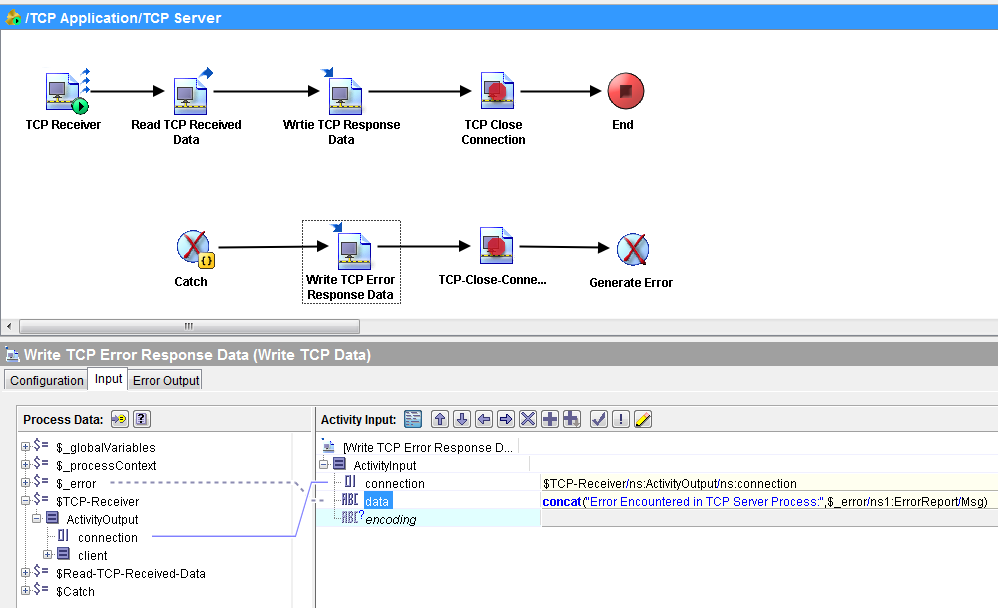
In case of any exception, It will be caught using Catch activity and then Error Response message will be sent back as shown in below diagram:
Now, we are done with the designing and configuration of our TCP Server process. Validate the process and once validated successfully, proceed with the next step in which we will develop TCP Client process.
Step 3: Develop TCP Client Process
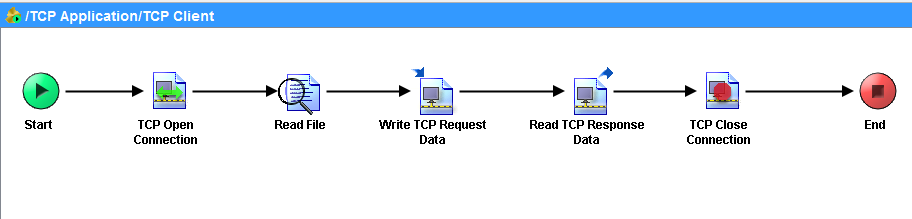
Our TCP Client Process will open a TCP Connection to a TCP Server (our TCP Server process created in previous step), rad data from a Text File, Send data to the TCP Server and then receive response back from the TCP Server and close the connection.
Based on the above sequence of activities, our TCP Client Process will look like below:
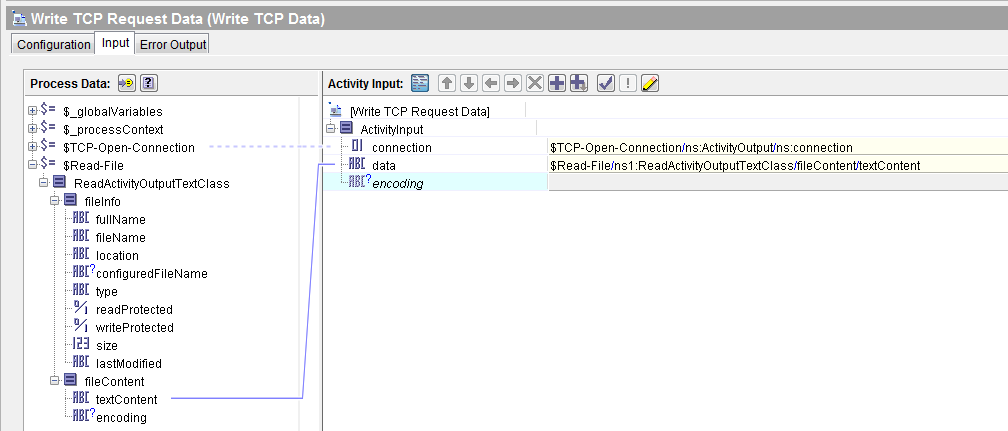
The activities in this process are configured in the similar way as done for our TCP Server process (as most of the activities are same). In the TCP Write Data activity, we will be writing Text File content as an input as you can see in below screenshot:
Once all activities are configured, validate the client process to make sure that there are no mapping errors.
After successful designing and validation of TCP Server and TCP Client processes, our next step is to run the processes and test that how TCP works in TIBCO.
Step 4: Run TCP Client and TCP Server Processes in TIBCO Designer
Load both client and server processes in designer tester and create a job for the client process. As you can see both processes have run successfully and TCP Client has received the response from the TCP Server process:

Abbasi,
If you specify the separator as none the read tcp data pallete freezes. Any solution to that?